Endzone Tower Setup
30' Tower Setup
Insert the tower into the base plate with wheels and then extend all 4 locking legs:
Then tighten all 4 knobs:
DON'T RAISE THE TOWER YET!
20' Tower Setup
Loosen the top mast knob and start spreading the three legs. It's easiest to anchor one leg against the ground and pull apart:
Expand the legs as wide as possible and then loosen the lower mast knob:
Lower the center mast pole to the ground and then re-tighten the lower knob:
Lastly, tighten the upper mast knob:
DON'T RAISE THE TOWER YET!
Wireless Camera Setup:
Step 1: Insert the Wireless Camera head into the tower and plug in all connections:
|
1.) Plug white camera USB cord into front battery into "Camera" port (white) 2.) Flip open Sony camera screen to turn it on 3.) Connect 1ft HDMI cable from camera to Connect Camera port on blue computer 4.) Connect long, blue ethernet cable to Ethernet port (use strain relief clip) |
5.) Make sure zoom cord is connected to Sony camera 6.) Connect yellow motor USB power cord to battery on side "Motors" port (yellow) 7.) LAST: Connect blue color coded USB-C cord to power port on computer and "Computer" port in front battery (blue) |
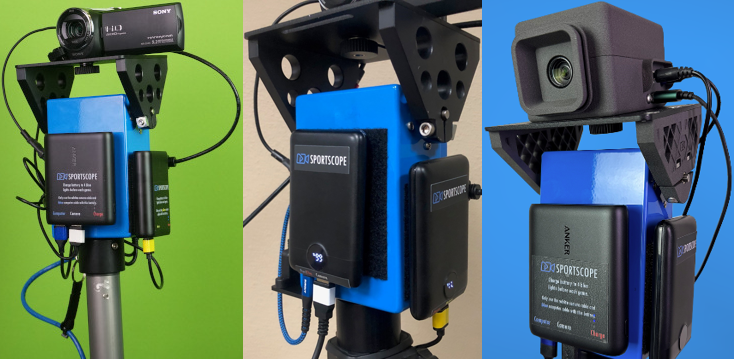
(Pictured: Many versions of the Smart Camera Head)
Wireless Network Setup
Step 1: Connect the Router power supply to the Router and Battery.
(Your router may look different than what is pictured).
Step 2: Switch on the battery to power the router
On your Router Battery there is a toggle switch to turn on the AC outlet port on it. Switch this into the "ON" position to give power to your router. This will provide power to the router. See the picture below:
Step 3: Plug the WiFi Antenna into the Router
(Your antenna may look different than what is pictured).
Connect the black Ethernet cable from the WiFi antenna into the router port labeled “Antenna”. This port is marked with a black dot.
Step 4: Attach the Antenna to the Tower
Important: The filmer can be up to 100’ from the endzone tower with either antenna type. The antenna below is directional so the face of the antenna must always be directed at the filmer.
Step 5: Connect the Blue Ethernet cable from the Wireless Camera to the Router
This will be the Ethernet cable we plugged into the blue Wireless Head earlier. Take it's other end and plug it into the port marked with the blue dot, as shown below.
Step 6: Verify the Camera is Ready
Next connect your iPad to the Sport Scope wifi SSID:
- Input your password, which can be founder on your router:
Open the menu on the left and tap on Cameras to check the status of the cameras. Verify that you can see the Endzone camera:
Next we will create a test game to temporarily test the Wireless Endzone Camera on the field to make sure everything is working:
- If you do not know how to create a new game yet, go to: How To Create and Start a Game.
Once the game is created:
- Test the motor controls (by default on the right hand of the screen).
- Test the zoom controls (by default left side of screen).
- Record a few test clips using the red record button.
Raising the Tower
- Loosen top knob and slide pole up.
- Once you feel the stopper, slide the pole down a few inches.
- Lock the knob and clip the blue ethernet cable into the large carabiner.
- Repeat with each pole to reach desired height.
IMPORTANT! - Always keep two hands on tower poles when raising or lowering for safety